Pinterest for Business: How We Grew 115,726% in 3 Months
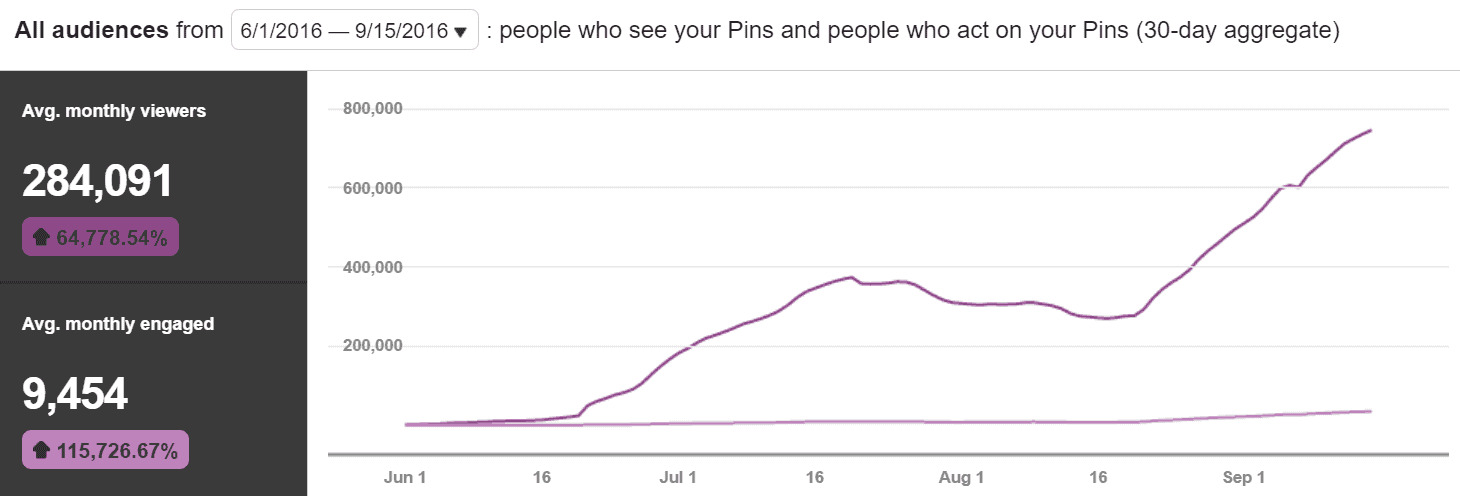
Using Pinterest for Business, we took a 0 follower account to a monthly reach of over 750,000 people in three months, as new Pinterest users with zero experience in marketing. Here's how you can do the same.

Some of the links on DollarSprout point to products or services from partners we trust. If you choose to make a purchase through one, we may earn a commission, which supports the ongoing maintenance and improvement of our site at no additional cost to you. Learn more.
First things first, that’s not a clickbait title.
I actually did increase our account engagement by 115,726% in 100 days, all while using Pinterest to market our business. And I’m going to show you how I did it.
Here’s a screenshot of our Pinterest for business analytics:
If you think Pinterest is just for women who want to look at recipes and outfits, think again.
The screenshot above is for our personal finance website, DollarSprout.
Personal. Finance.
Probably the last topic you’d ever expect to do well on Pinterest. At least that’s what I thought, as a 20-something male who’s never used Pinterest in his life.
It doesn’t matter what your business or website is about — if you aren’t on Pinterest for business, you are seriously missing out on a ton of exposure, traffic, leads, and ultimately, revenue for your business.
So how did we grow a predominantly male-focused niche on Pinterest? That’s what I’m going to show you.
Pinterest Marketing Using Pinterest for Business: The Ultimate Guide
Here’s what I’m going to cover in this Pinterest for business set-up guide:
- Create a Pinterest for Business account and set up Rich Pins
- Create a “Best Of” board
- Make multiple pins for each blog post
- Brand your pins to stand out
- Join group boards (the exact tactics we use)
- Put things on autopilot with a Pinterest scheduler
- Reapply to the group boards you never heard back from
To do everything that I’m going to outline in this post will take a couple of months (if you do it correctly), but I promise you it will be worth it.
1. Create a Pinterest for Business account and set up Rich Pins
You want to make sure you aren’t using a personal account to build up your Pinterest profile for your website.
With a Pinterest for Business account, you’ll have access to Pinterest Analytics, as well as the ability to create “Rich Pins.”
If you have a little money to devote to Pinterest marketing, you can also pay Pinterest to promote your pins with a business account. That’s definitely not necessary, but it’s a nice option. We experimented with about $50 worth of promoted pins before figuring out we could make our pins go viral on our own, without the help of ads.
Rich pins make your pins stand out just a bit more by adding a bold link title in your pin description. Getting rich pins is really easy (and free). You just need to confirm your website within your Pinterest for Business account.
Related: 15 Facebook Groups That Will Drive Insane Traffic to Your Website
2. Create a “Best Of” board
Once you have a Pinterest for Business account, the next step is to create your “Best Of” board.
The purpose of this board is to house only pins that link to content on your own website. This is not the place to pin other people’s stuff. You can (and should) make a bunch of other boards for that.
When other users are looking at your account and deciding whether or not they want to follow you, they are going to be looking for this board to give them a sense of what type of content you are contributing to Pinterest.
In your board description, be sure to include lots of keywords that users might be searching for.
Ideally, you’d like to have at least 50 or so pins on this board. If you don’t have that many pieces of content, don’t worry. See the next step.
3. Make multiple pins for each blog post
This is important for a few different reasons.
First, it’s always smart to A/B test your pins.
“You could write the best blog post in the world, but if I don’t feel like clicking on your pin, you’ve just lost the game.”
Experiment with different image backgrounds, different calls to action (CTAs), and even different keywords in your description.
The other benefit of making multiple pins is that it makes it a little easier to run up your total pin count on your “Best Of” board. This helps when it comes time to apply for group boards, as you want to have a decent portfolio of pins that you can share.
I generally try to make 2 or 3 pins for each article.
4. The key to Pinterest marketing: Brand your pins to stand out
I’ll be the first to admit, I could have done a much better job of this when I was first making the pins for our VTX Capital account. I just didn’t know any better.
Then one day, as I was scrolling through my Pinterest feed, this pin caught my eye:
Before I looked down to see who the creator of the pin was, I knew it was going to be from Pauline Cabrera over at BRAND GLOW UP. Without even realizing it, I had subconsciously begun to recognize her purple-themed pins with the crisp block font.
And I knew that those pins led to really good content, so I clicked on the pin and ended up reading her article.
That’s when it dawned on me how important branding is when it comes to creating your pins, as long as you have great content. The only reason I clicked on that pin and went to her website was that it stood out to me in the sea of pins on my feed.
So since I’ve launched this new website, I’ve been keeping Pauline’s focus on awesome branding in the back of my head. Here’s a look at how my pins appear now:
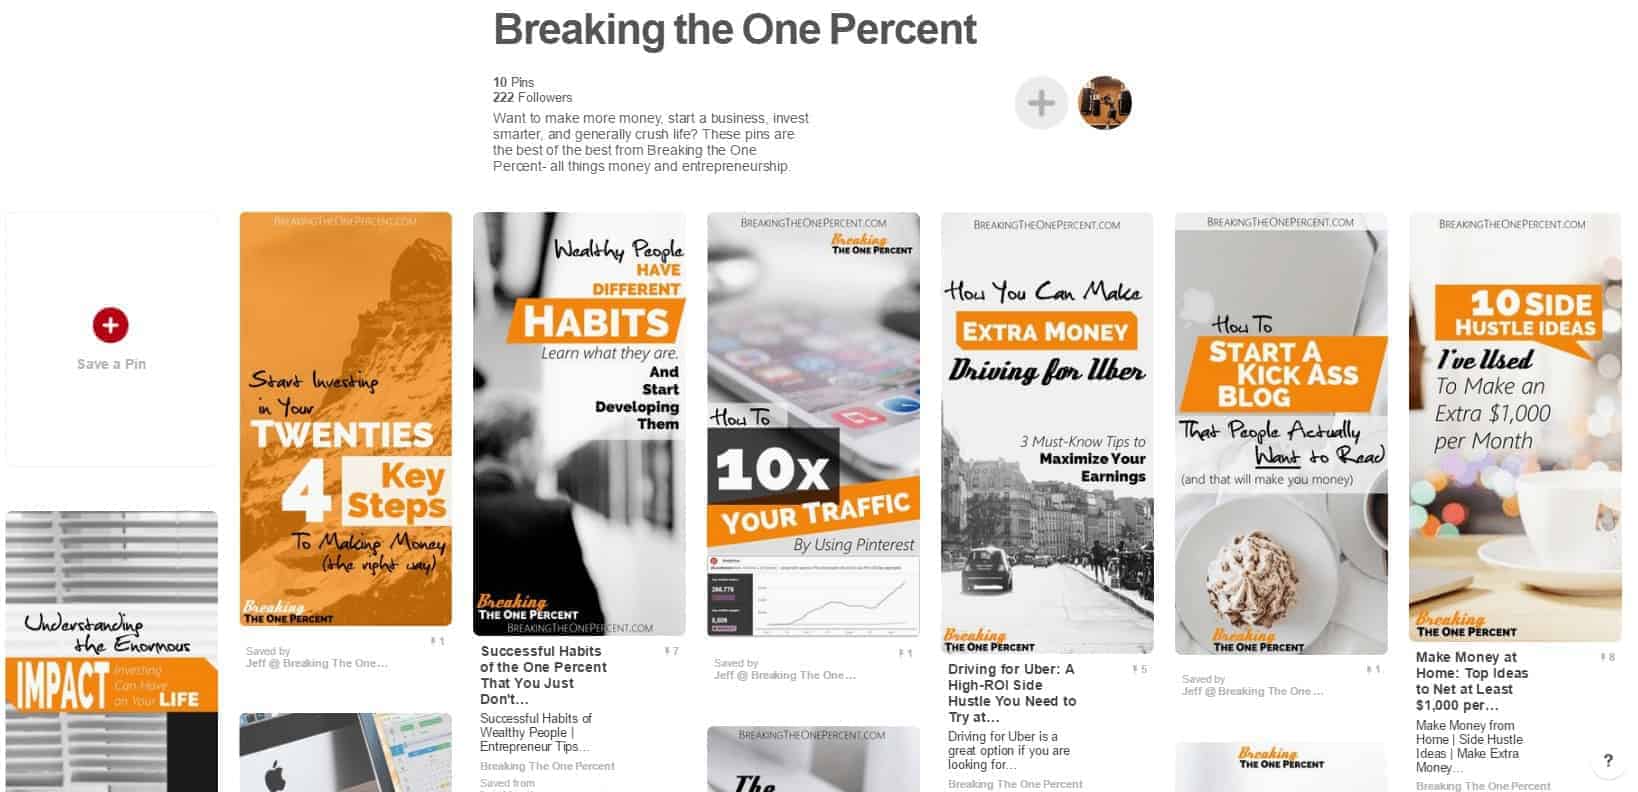
There are a few key points I’d like you to note with these pins:
- They all have some amount of our main brand color: orange.
- Pins that have both scripts and block font perform well.
- The background images are all very light/white themed. This makes the text stand out more.
- I don’t have a rigid format for each pin. I switch it up constantly, while still keeping the same theme.
- Each one has both a logo and our .com address.
Having rock-solid brand recognition is so important if you want to succeed with your Pinterest marketing.
A lot of people use Canva or Photoshop to make their pins, but I’m old-fashioned and just use PowerPoint. Whatever works best for you is fine.
5. Join group boards
This is where the real magic is with Pinterest. If you don’t know yet, the number of followers you have on Pinterest doesn’t mean much. You can drive hundreds of thousands of hits each month to your website with less than 100 followers.
To help, you’ll want to be on as many quality group boards as you can. I cannot stress the quality aspect enough.
So, how do you get on these group boards? You have to hustle.
The first step is to compile a list of boards that you would like to join. The best way to do this is to look at what group boards some of the top accounts in your niche contribute to.
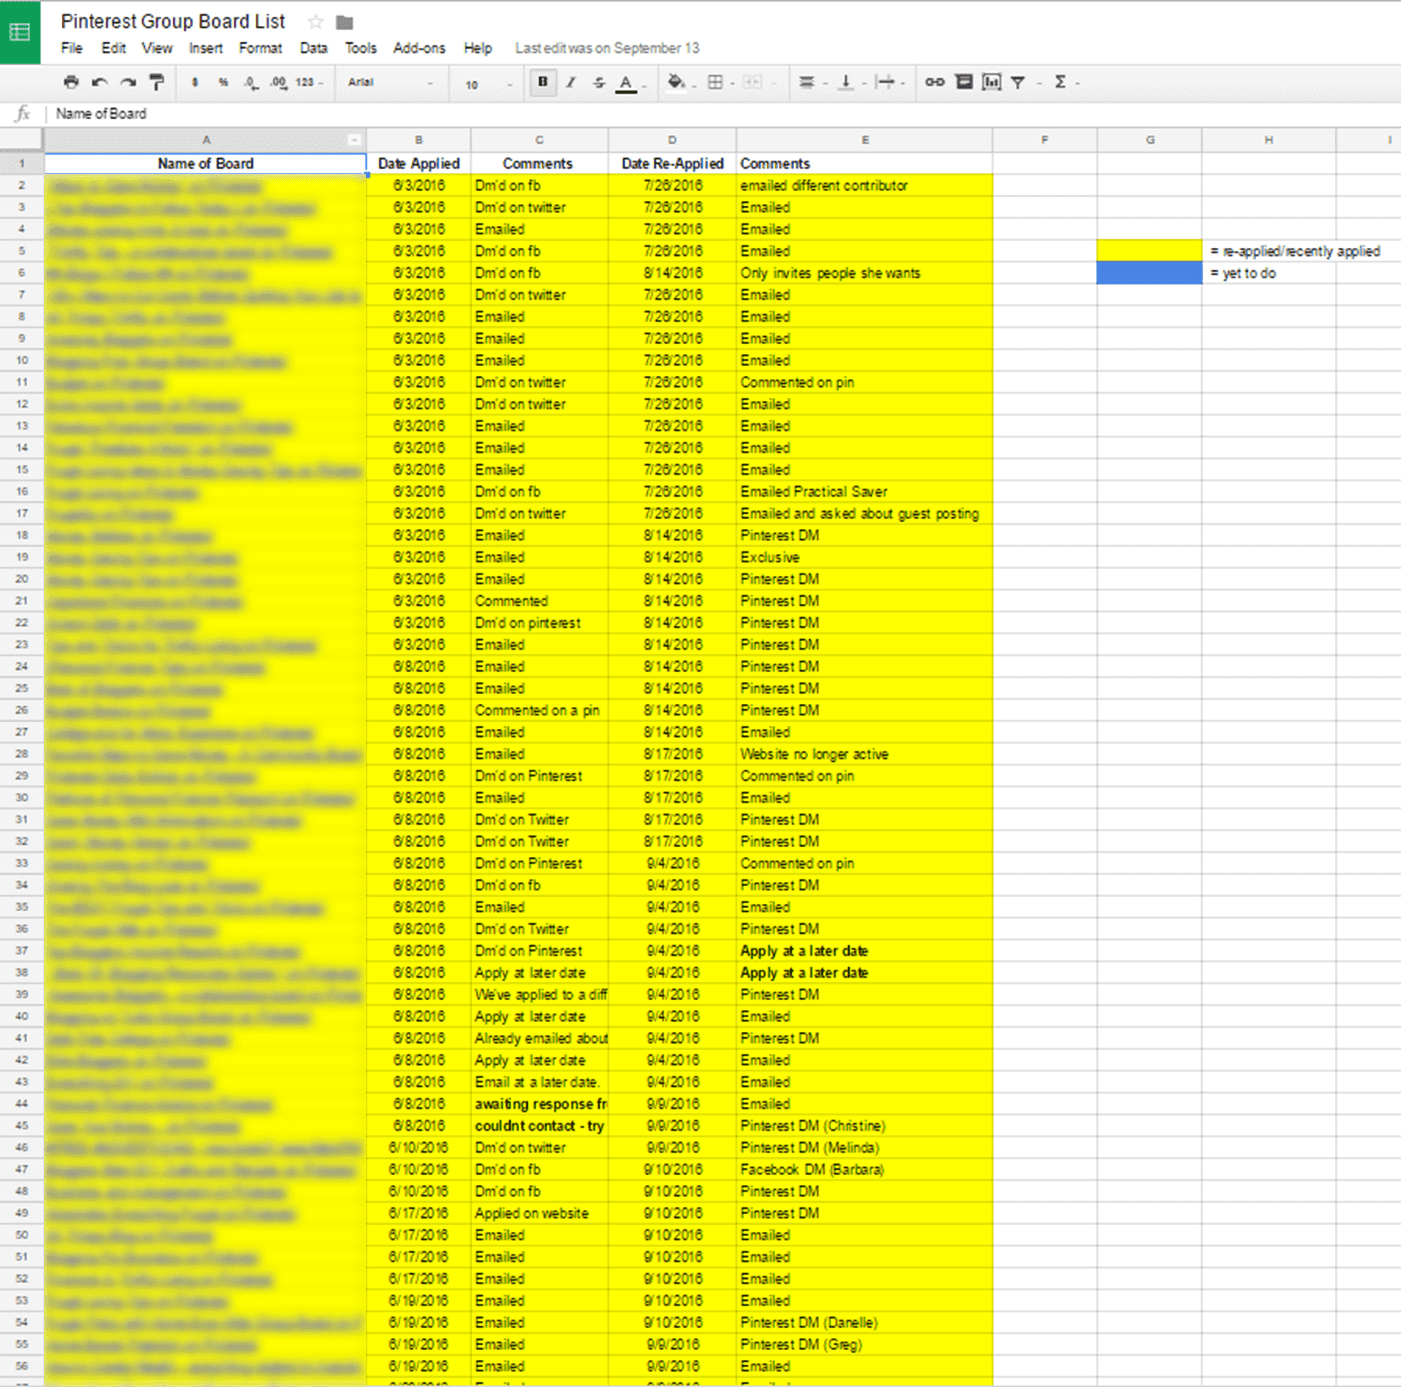
Each group board admin is going to have a different way that they want you to apply to their board. Some want you to email them, some prefer a direct message, some want comments, and some don’t give you any directions at all (that’s when you go full-on stalker mode and go to their website and search for their contact info).
Mass group board application means a lot to keep track of, so I recommend using a spreadsheet similar to mine below (we applied to well over 100 but this screenshot only shows the first 56 boards).
Once you have your spreadsheet started, it’s time to get to work and start contacting all of these people.
It’s going to take you a long time, and most of the time, you will never hear back, and you’ll never get added to their boards. That’s just the way it goes, and it’s okay. You gotta cast your net wide and understand that rejection is just part of the game.
Here’s the email template Ben and I used to contact group board owners:
I was hoping to catch you and see if you would be open to adding me as a contributor to your ___________ (actually link to the board, they may have several and this makes it easier for them) group board. I regularly write about __________, ___________, and __________ topics on my website that would be both interesting and valuable to your readers. I also like to regularly promote and highlight other members of the community so that everyone benefits from collaborating. My Pinterest profile: ____________ Thanks a bunch, Jeff
My Pinterest email: __________
Don’t overcomplicate it. Just send a quick note and give them all the relevant info they need so they can scope out your profile and make a decision on whether or not to add you.
Also, make sure that you are following the board and the board owner before you contact them. Please.
6. Use a Pinterest pin scheduler
This is where automation comes in.
Instead of manually pinning each of your pins to your group boards all the time (along with finding other people’s stuff to pin), there is software out there — a Pinterest scheduler — that takes care of all that for you. And it’s awesome.
I’ve used a few different programs, but my favorite Pinterest scheduler by far is Tailwind.
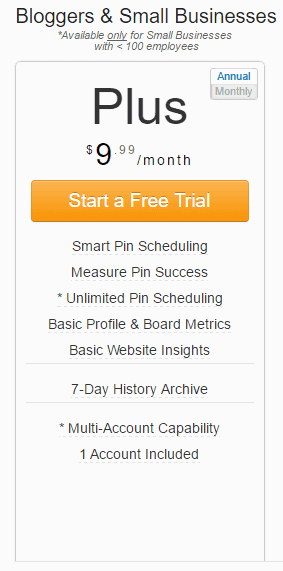
One of the coolest things about Tailwind is its Smart Scheduling feature. What this means is that it will schedule pins for when your Pinterest audience is most engaged (using its own proprietary algorithm).
You don’t have to worry about picking the right times to post pins. This takes your Pinterest marketing efforts to a whole new level.
I can honestly say that investing in Tailwind has been the best money I’ve spent so far in my online entrepreneurship journey.
To give you an idea of the ROI of Tailwind, the first month of using it (at just $9.99/mo), I made over $1,200 in affiliate sales from the increase in traffic. I had never made an affiliate sale before then.
If you take the time to do the first 5 steps in this post, then Step 6 is an absolute must-do.
Start your free trial by using this link.
7. Reapply to group boards that you never heard back from
Just because you were rejected the first time doesn’t mean you should give up. There are a bunch of reasons why you should revisit your spreadsheet every few months:
- The board owner might have missed your DM, email, etc.
- Your profile might not have been good enough back then, but now it’s much better.
- They could have just forgotten to add you.
No matter what might have happened the first time, go ahead and get back in touch with them. You have nothing to lose.
Don’t use the exact same script, and be sure to remain polite and courteous.
Mastering Pinterest Marketing Takes Some Time and Effort
But like I said before, it is so worth it.
For new websites, ranking high on Google is just not going to happen overnight, but Pinterest can be your secret weapon. The great thing about Pinterest is that it’s actually a really great search engine, it’s just disguised as a social media platform. It is, bar none, the best way to get your name out there if you are a content producer.
If a guy like me can take a Pinterest account from 0 followers to a monthly reach of 750,000 people in just three months, then anybody can do it.


