17 Things to Include in Every Single Blog Post
Our readers always come first
The content on DollarSprout includes links to our advertising partners. When you read our content and click on one of our partners’ links, and then decide to complete an offer — whether it’s downloading an app, opening an account, or some other action — we may earn a commission from that advertiser, at no extra cost to you.
Our ultimate goal is to educate and inform, not lure you into signing up for certain offers. Compensation from our partners may impact what products we cover and where they appear on the site, but does not have any impact on the objectivity of our reviews or advice.
Want to systematically write the perfect blog post every single time? From SEO optimization to content upgrades, a blog post checklist will help you get the most out of each and every article your write.


Some of the links on DollarSprout point to products or services from partners we trust. If you choose to make a purchase through one, we may earn a commission, which supports the ongoing maintenance and improvement of our site at no additional cost to you. Learn more.
What’s the one thing all bloggers need to be successful?
Traffic.
They need traffic, in the form of new (or returning) readers, to come digest, appreciate, and share the content they’ve spent tons of time creating. They need traffic because it’s the source for the one thing we’re all after — customers.
Now, the challenge of getting readers to your blog can be enough to drive you mad.
One day your numbers are on the rise. Life is great.
The next day your numbers are plummeting, and you have no idea why.
Every blogger has experienced the struggle that is getting traffic.
Fortunately, and more often than not, there is one easily identifiable reason as to why readers are not visiting your website in the volume you think they should: You’re not using a consistent method of structuring and promoting your content.
Think of it this way: If someone clicks through to your post and can’t immediately figure out what your article is about — or what’s in it for them — they’re gone.
Don’t make that mistake. Since getting traffic is so hard, you want to make sure you’re getting the absolute most out of it.
You can accomplish this by using a blog post checklist.
Today, I’m going to share with you the exact steps you need to take both before and after you publish a blog post. With a blog post checklist, you’ll finally be able to get eyes you want on your blog posts, and you’ll keep them coming back for more.
What to Do Before Publishing Your Content
Creating great content is the most important step in getting readers to your site, and keeping them there. If your content isn’t good, you may attract readers, but they won’t stick around very long. Here’s what to do before you publish an article.
Step 1. Use compelling titles
Your readers aren’t going to randomly stumble across your blog post for no good reason. You need to lure them in.
How do you do that, you ask? With a clickable title.
A clickable title draws the reader in by alluding to something that genuinely interests them. Often the title presents a problem and the article offers a solution.
Everything else on this blog post checklist is useless if a reader glazes over your article on a SERP because your title sucked (and they never clicked through). An increase in click-through rate (CTR) from 0.7% to 1.4%, just because you took the time to re-draft a better title, means more readers to your blog (100% more in this particular example).
Titles are that important. Here’s a great headline tutorial by our friend Pete that is insanely helpful.
Step 2. Use easy-to-read formatting
This seems like it would be obvious, but bloggers really do struggle with this. Fortunately, there are some easy things you can do to help transform your boring blog post into a literary work of art.
- Break up long paragraphs into shorter, 1-2 sentence thoughts
- Use pictures frequently (optimized for size and with good “alt” text of course)
- Correctly use subheadings to group similar content (H2, H3, H4…etc.)
- Use bold and italics to highlight key points, but take care not to overdo it
Readers don’t want to have to scan through massive chunks of text to find what they’re looking for. They want bold points that help them find their answers, a list format so they can skim easily, and a variety of short and long sentences to give a break on the eyes.
Also, consider checking out Yoast if you’re not already using it to help SEO your posts.
Chances are that most of you are already using it, you’re just neglecting to actually click over to the Readability Score that’s just off the main tab.
If the plugin is consistently giving you red or orange scores, there’s a pretty good chance that search engines are similarly not very fond of what you’ve written.
Step 3. End your post with a call to action (CTA)
Don’t leave your readers hanging. Always end your post with a call to action. Preferably one that further helps promote your content.
A call to action directs your readers to the next step in your customer journey, like signing up for your email list, leaving a comment, or purchasing your product.
Some good CTAs to experiment with are:
- Having the reader share the content on a specific platform (having sharing buttons is great but further prompting a reader to share on a specific platform is even better).
- Encourage discussion in the comment section.
- Compel visitors to opt in to a content upgrade/freebie.
- Provide a link to a specific post for further reading.
Step 4. Link to other relevant posts
Asking readers to check out another post can be an effective call to action, but it’s not the only place you should be linking to your own blog articles. Don’t forget to link to other posts throughout the body of your article.
If you talk about anything in a post related to other blog posts you’ve written, make sure to link to those posts using appropriate anchor text.

Interlinking promotes a better user experience, provides context for search engine crawlers to better understand what your article is about, and keeps visitors on your website longer. And those aren’t the only benefits.
Objectively, interlinking also helps reduce bounce rates, increases session duration, and generally leads to more ad revenue (if you have ads).
Interlinking blog posts also passes link equity from one post to another. Give specific content an SEO boost by interlinking to that post from other high-authority pages on your website.
This will generate more pageviews as your readers jump from one blog post to another. I know I’m guilty of spending hours on one blog when the content is engaging and helpful to me.
Step 5. Spend more time revising your content
Every blogger is guilty of having to go back through and edit posts they’ve already published. Whether it’s to edit a sentence that doesn’t make sense, or merely to fix a small typographical error, it’s important your work is as error-free as possible.
Before you hit that publish button, make sure to re-read your post…and then read it again.
Fix obvious errors and try to identify sentences that may not make sense to weaker readers. Some people may not re-visit your blog if your content is sloppy painfully difficult to read.
If that doesn’t scare you enough, know that search engines may choose not to index your content altogether if there are too many grammatical errors or misspellings. If you’ve got a few bucks to spare, consider hiring a proofreader to take a second look at your content.
Step 6. SEO your posts
You may prefer to use platforms such as Pinterest or Facebook to promote your blog post, but if you don’t currently have some sort of search engine optimization (SEO) strategy in place, you’re missing out on a super lucrative traffic type.
Search engine traffic is the most valuable type of traffic, bar none.
Just think about it: people have specifically searched for a solution to a problem, and your blog is there to provide the answer. They naturally have high purchase intent because they need help fixing something.
Rather than somebody randomly stumbling upon your pin on Pinterest that casually caught their eye, they’ve specifically entered a search query and you’re going to provide them a solution.
Search engines not only bring traffic, they bring customers.
Install Yoast if you haven’t already, and learn more about SEO from one of the best, Brian Dean.
Step 7. Add images that are relevant to your content
You’ve heard it a million times before. A picture says a thousand words.
Utilize images in your blog posts to portray what your post is about. They can be used to break up content, provide context, and pique a reader’s curiosity as a picture begins to load.
They can also work to effectively play on the emotions of your reader. Emotion has been shown to enhance reader engagement and further pushes them to the end of an article.
Lastly, be careful not to use images that you didn’t create. Copyright infringement is a real thing and the civil penalties can be severe. Play it safe and use images from our list of free stock photo sites.
Step 8. Don’t forget to add alt text to your images
Alt (alternate) text is what helps search engines understand what an image is about.
If a picture cannot be displayed on a user’s device, the alt text is what shows up in its place. Make sure your alt text has your SEO keywords in it as that will help Pinterest, Google, and other search engines identify what your image (and blog post) is about.
Step 9. Add a freebie or content upgrade if applicable
Who doesn’t love freebies?!
You make it easy for readers to like you when you’re constantly giving away free information that will help them solve a specific problem.
For example, if you wrote a recipe post, add a printable version of the recipe for your reader to use so they can keep it for future reference.
People love free, valuable stuff. Surprise, surprise.
Step 10. Create 2-3 “pinnable” images and add at least 1 to your post
Sites such as Canva can help you create “pinnable” images. A pinnable image is, ideally, an irresistible image people just “have” to share on Pinterest because they enjoyed your content and think it may be helpful for others.
Creating two, or even three, pinnable images allows you to A/B test and figure out which one is working best. You may be surprised which one resonates best with your readers.
Another valuable reason for making 2-3 images is that you can circulate them on Pinterest without it looking like you’re “spamming” (all while combating ad fatigue).
Step 11. Make your post shareable
If you don’t have social media share buttons installed on your blog, do it now.
There’s almost no better way to get extra readers on your content than to have your current readers promote it for you. It also adds social proof to have readers sharing your content.
Facebook, Pinterest, Instagram, Twitter, StumbleUpon, Google+…get a social sharing plugin, like Social Warfare, and pick the platforms that you think your content will resonate well on.
More shares equals more traffic.
What to Do After Publishing Your Content
A blog post is never finished after you hit publish. You’re only just getting started. With that in mind here are some essential ways to get the most out of your content after it goes live.
Step 12. Pin it
Search engine traffic is amazing, but it takes time before your blog post will begin to rank and bring traffic.
On the other hand, sharing your post on Pinterest can generate traffic within minutes.
Try sharing your post on high-quality group boards with a large number of followers, but a relatively lower number of contributors. That way your content will get maximum impressions, but won’t be lost within minutes by the hundreds of pins being added by other contributors.
Step 13. Share on other social media platforms
Immediately after sharing your post on Pinterest, you’ll want to then share on Facebook, Instagram, Twitter, and whatever other social media platforms you use.
While you may not be active on all the platforms, as mentioned above it’s important to at least have share buttons for all the platforms.
This way your readers can share on StumbleUpon, Facebook, Google+, and more, even if you don’t.
The more shares, the more traffic.
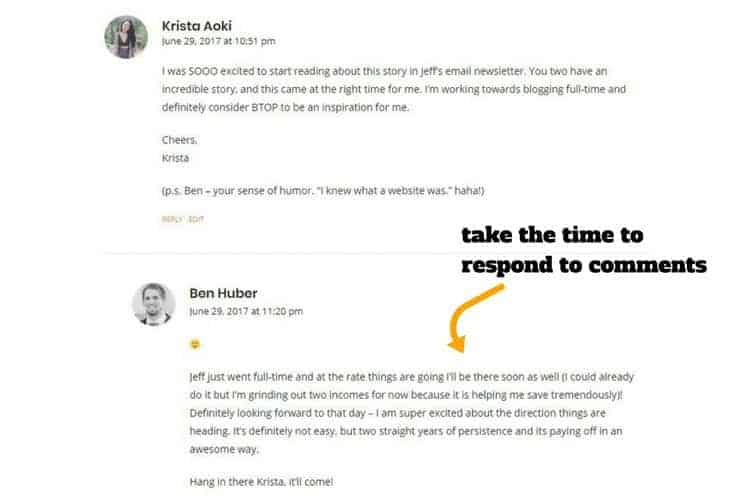
Step 14. Respond to comments
As a blogger, you’ll start to grow a small, and hopefully loyal, audience that consistently engages with your content.
Your readers will be much more likely to come back for more if they feel connected to you beyond the words you’ve written on a virtual page.
When your readers feel they know you as a person and can communicate with you, they’ll likely subscribe and continue to trust you with the valuable information you share with them. Be sincere and thoughtful in the way you respond to your readers’ comments.
Sharing a video that you’re featured in is another great way to build that same sense of trust. It helps promote a sense of familiarity, as if the reader almost personally knows you — even if they’re thousands of miles away.
Step 15. Link back from future posts
It’s likely that, in the future, you’ll write more posts that correlate with the one you just published.
When the opportunity arises, don’t pass up the chance to go back and link to articles you eventually write. It will provide referral traffic to your newly-published article, reduce bounce rate, and help readers find legitimately helpful information on your site.
Sometimes, if an article is outdated and the content is no longer relevant, you can 301 redirect the old URL to a new post with fresh, newly updated content. In doing so, you preserve about 95-99% of the link equity the old article contained, and it gives your newly-minted article a huge boost.
Step 16. Re-read, revise, republish
I know we already talked about revising and editing, so why is this in the “After You Publish” list?
Because I’m trying to get it in your head that if you’re not constantly going back through your posts and updating them, you’re doing your readers (and search engines) a disservice. Keep your information up to date.
A successful blogger will continually revise and edit their published posts. A few of the things they might do to polish their posts up include:
- Switching out old opt-ins with a more relevant freebie
- Creating a new pinnable image
- Using a different phrase for a link to improve anchor text and interlinking
- Re-organizing/updating information
All of these things can breathe new life into an older blog post. Re-purposing content can be incredibly powerful and a more efficient way of getting new readers to your site without having to create an entirely new piece of content.
Step 17. Create similar content
If you publish a blog post and it does really well, there’s a good chance you’re onto something your readers are actively looking for.
It’d probably be a good move to create more similar content to the post that’s gone viral and see if it also performs well.
For example:
Say you publish a post on 12 Ways To Save Money On Groceries and it goes viral. I would then consider authoring a post like, The Top 10 Cheapest Foods To Buy when Grocery Shopping on a Budget.
It’s similar in nature, and it goes about solving a similar problem that your readers were obviously desperate to fix before. Then, you can link the posts to one another, effectively creating a web of similar content that will keep your readers captivated for longer periods of time.


